1 Overview
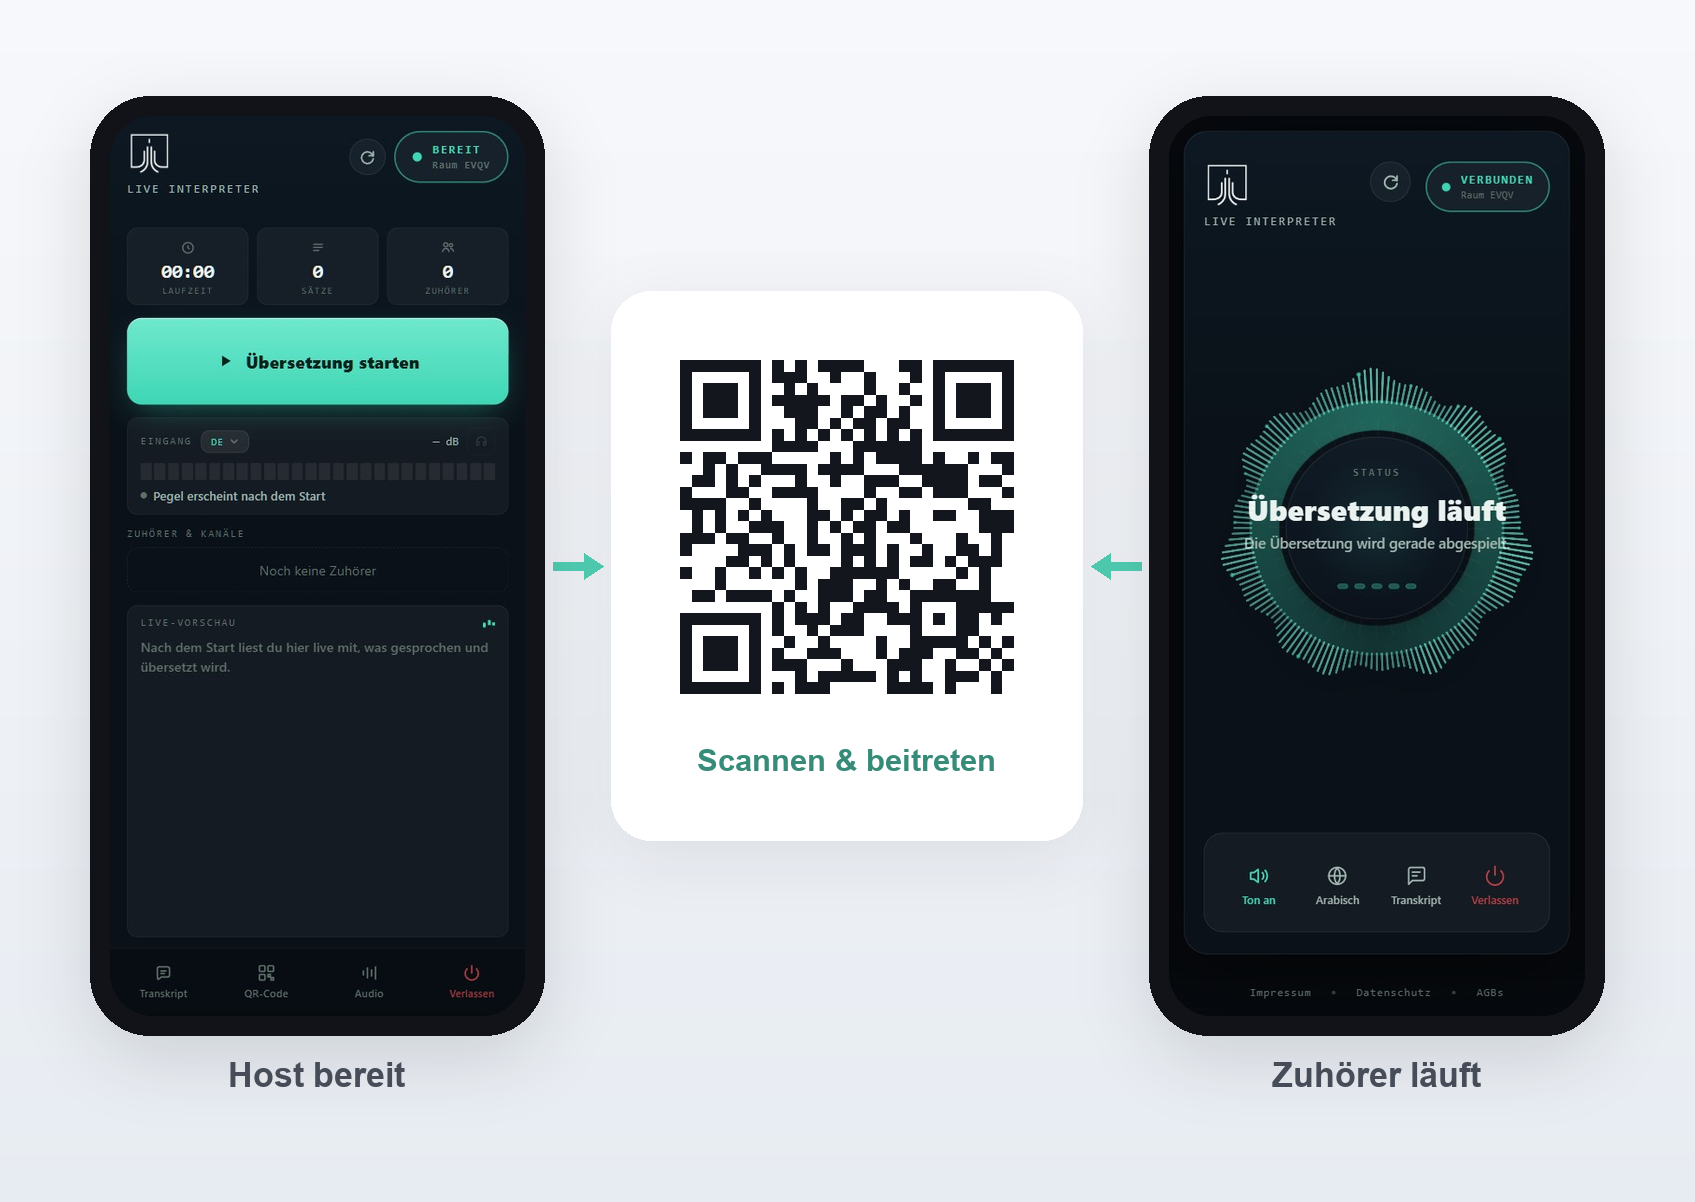
Live Interpreter has two sides that work together:
The host side
This is your side. Here you speak, control the translation, see the live transcript and manage your rooms. It's best to open the host side on a laptop or tablet with a good microphone.
The listener side
This is your listeners' side. They open it on their own smartphone, choose their language and hear the translation through headphones. You should know what they see there so you can help if questions come up (section 5).
The room
Both sides meet in a room. A room has a fixed code and QR code that listeners use to join. The code stays valid permanently. You can set up separate rooms for different events.
2 Create and share a room
- Sign in. You land in the Verwaltung (management area), the overview of all your rooms.
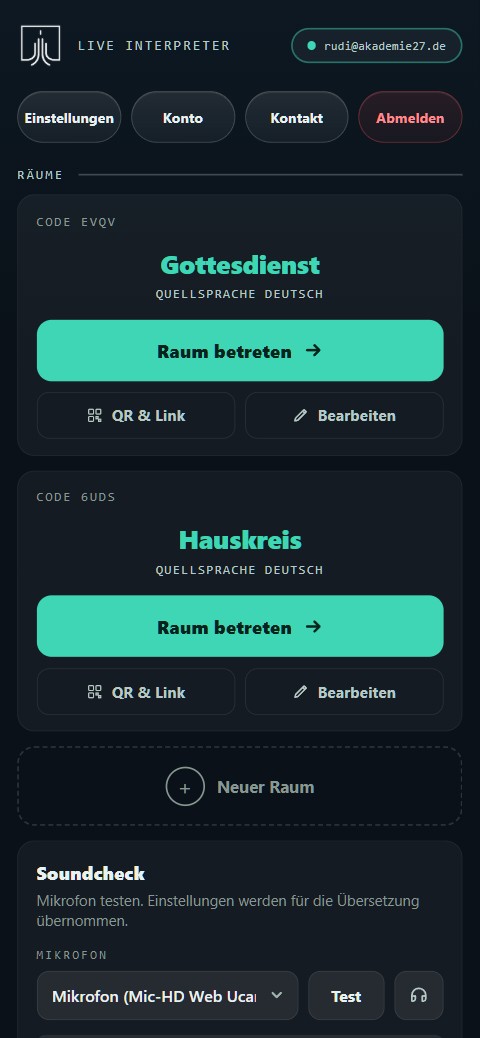
The management area with your rooms and the sound check. - Tap „+ Neuer Raum" (+ New room), enter a name and choose your source language, that is the language you speak in.
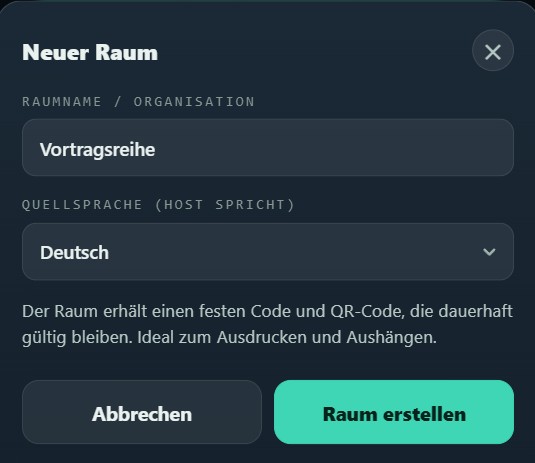
Creating a new room: name and source language. - On the room, open „QR & Link". There you find the QR code, the direct link and a printable flyer.
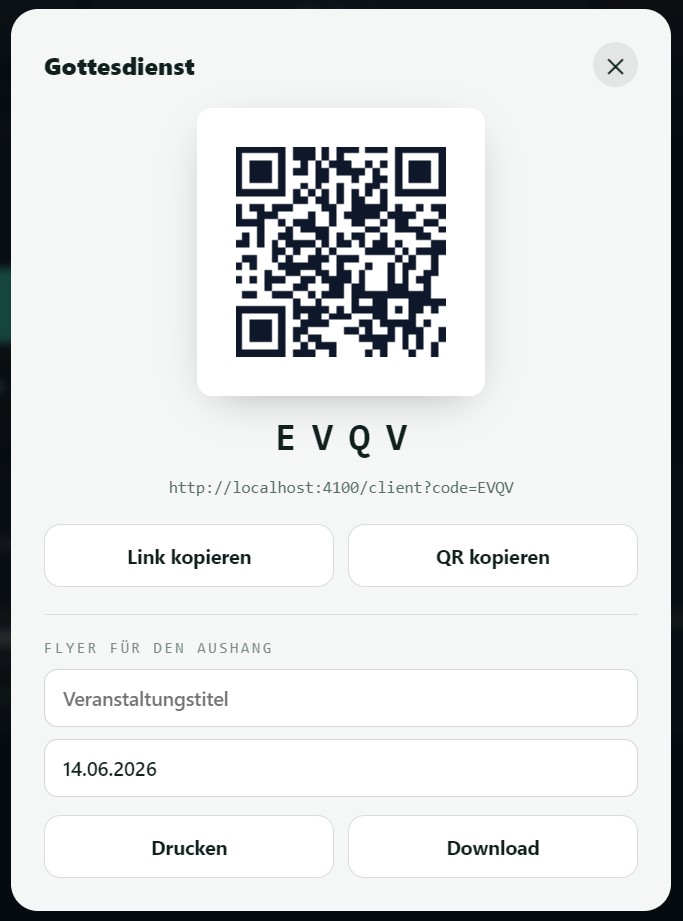
QR code, direct link and flyer for sharing. - To edit or delete a room, tap „Bearbeiten" (Edit). There you change the name and source language, pre-assign languages (section 6) and can permanently delete the room if needed.
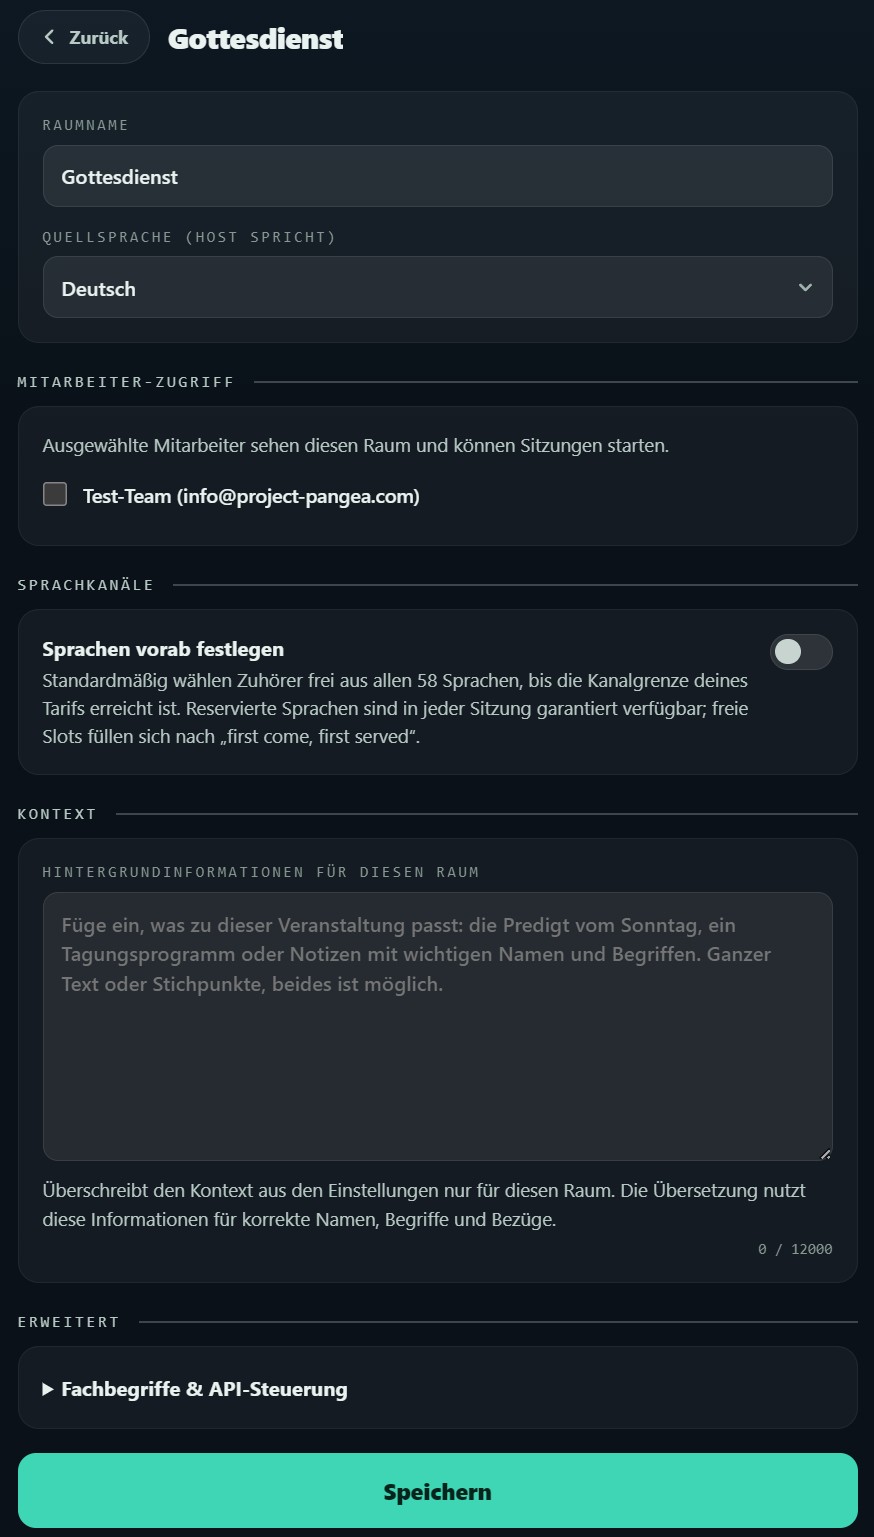
Room editing: staff access, language channels and context.
3 Audio: microphone, gain and monitoring
Sound quality is the single most important factor for good results. The cleaner the signal, the more accurately the app recognises and translates. Go through this section carefully once.
Choosing a microphone
You select the microphone in two places: in the Soundcheck in the management area (before you start) and in the Audio settings inside the room (while running). Use a microphone close to the person speaking where possible, such as a clip-on or headset mic. Built-in laptop microphones at a greater distance give noticeably worse results.
Setting the gain (amplification) correctly
The gain controls how much the microphone signal is amplified (range 0.5× to 4×, default 1.0×). Set it using the level meter, not by feel.

The meter gives you direct feedback:
A good starting point is 1.0×. Only increase it if the meter constantly reports „Sehr leise" (Very quiet). For most microphones the ideal value lies between 1.0× and 1.5×.
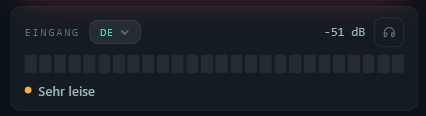
Monitoring the input signal
Using the headphone icon in the input-level area, you can hear exactly what the app hears. This lets you check before and during the event whether your speech arrives clearly and without background noise. Only use this feature with headphones, otherwise the sound travels back into the microphone through the speakers and disrupts recognition.
Monitoring a translation
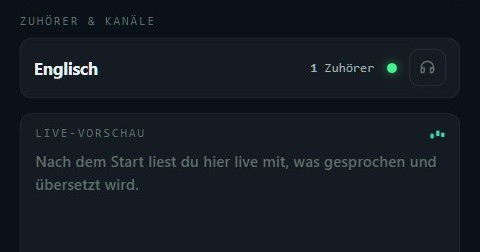
In the „Zuhörer & Kanäle" (Listeners & channels) list you can choose Mithören (Monitor) for each active language. You then hear the finished translation of that language, exactly as your listeners do. This lets you spot-check during operation whether a translation sounds good. Again: headphones only.
4 The host view: controlling translation
- Open your room via „Raum betreten" (Enter room). This takes you to the actual Live Interpreter interface. That is the control surface for live operation.
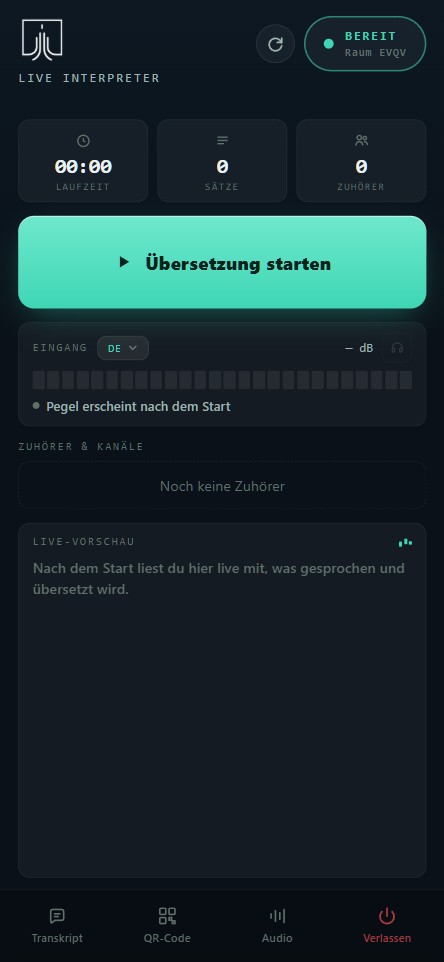
The live view before starting: status „Bereit" (Ready) and the big start button. - Click „Übersetzung starten" (Start translation) to begin translating. Translation only starts, however, once at least one listener is in the room. If no one has connected yet, you see a notice and the timer isn't running yet.
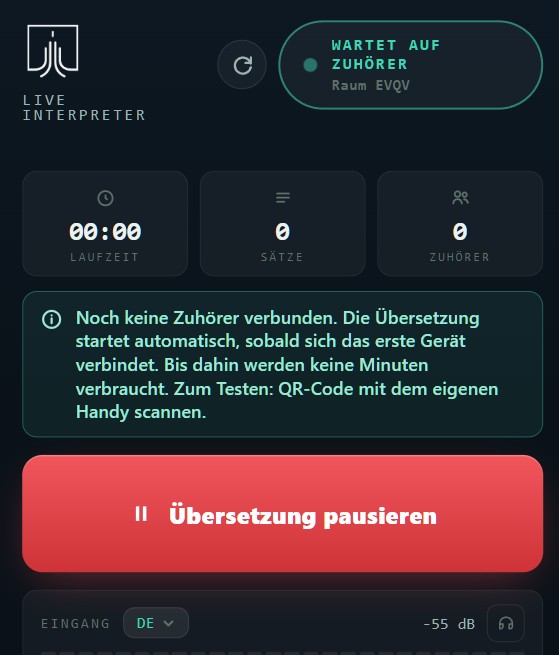
„Wartet auf Zuhörer" (Waiting for listeners): as long as no one is connected, the timer does not run and no minutes are used. - Once translation is running, the transcript shows you in real time what is recognised and which languages it is translated into.
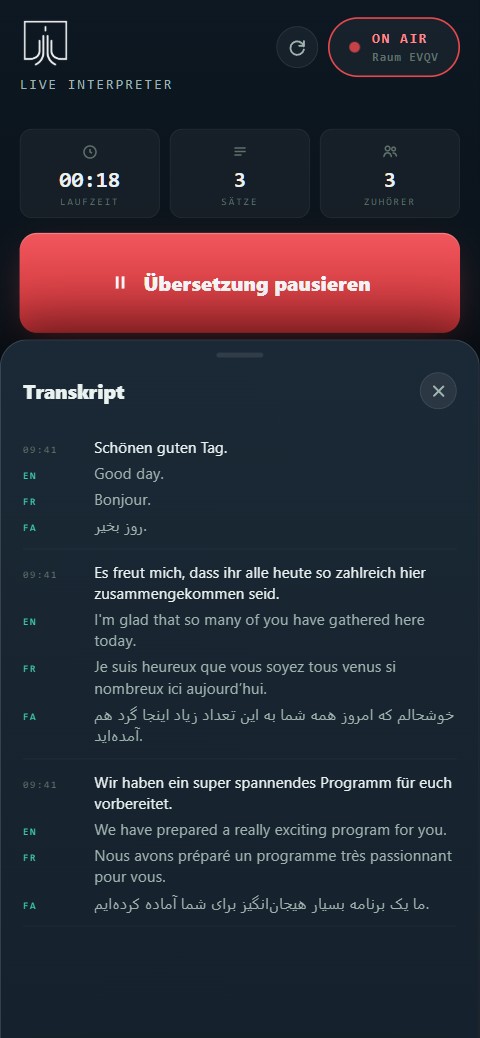
On Air: status indicator, sentence counter and the multilingual live transcript. - During worship or at other times in your event you may not want translation running. A single click on „Übersetzung pausieren" (Pause translation) is enough. Live Interpreter then mutes everything. Another click on „Übersetzung fortsetzen" (Resume translation) picks the stream back up.
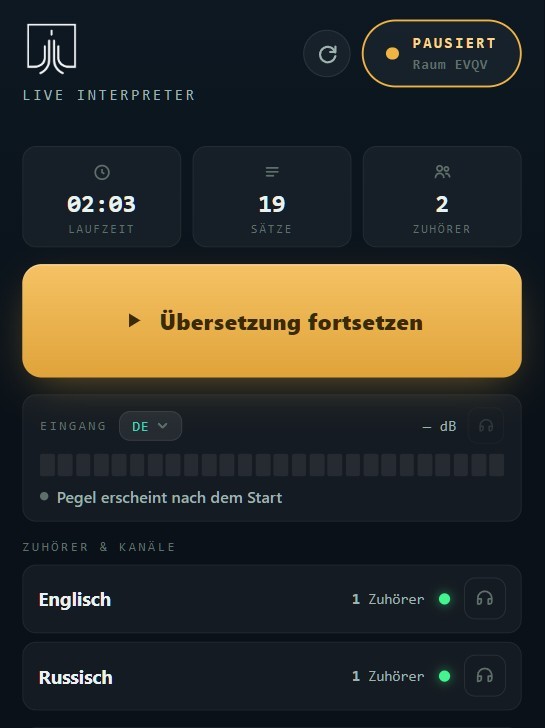
Paused: „Übersetzung fortsetzen" (Resume translation) picks the stream back up; your listeners stay connected. - If you want to end the session completely, click the „Verlassen" (Leave) button at the bottom right. You then have two options:
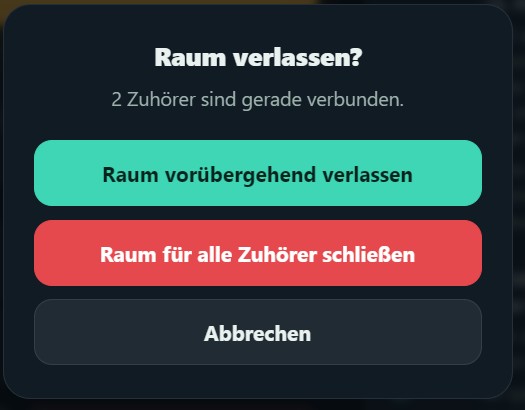
When leaving you choose whether to just pause briefly or end the session for everyone. - „Raum vorübergehend verlassen" (Leave room temporarily): you leave the room only briefly and re-enter it later. In the meantime all listeners stay in the room and you can resume the translation seamlessly.
- „Raum für alle Zuhörer schließen" (Close room for all listeners): at the end of the event or service this ends the session completely and lets you „kick out" all connected devices.
The status indicator
At the top you can always see the current state. Here's what the indicators mean:
The „Neu verbinden" (Reconnect) button
Next to the status indicator there's a round reconnect button. If the sound cuts out or something stutters, use it to rebuild the connection. On the host side the page reloads, after which you click „Übersetzung starten" (Start translation) again.
Changing audio during operation
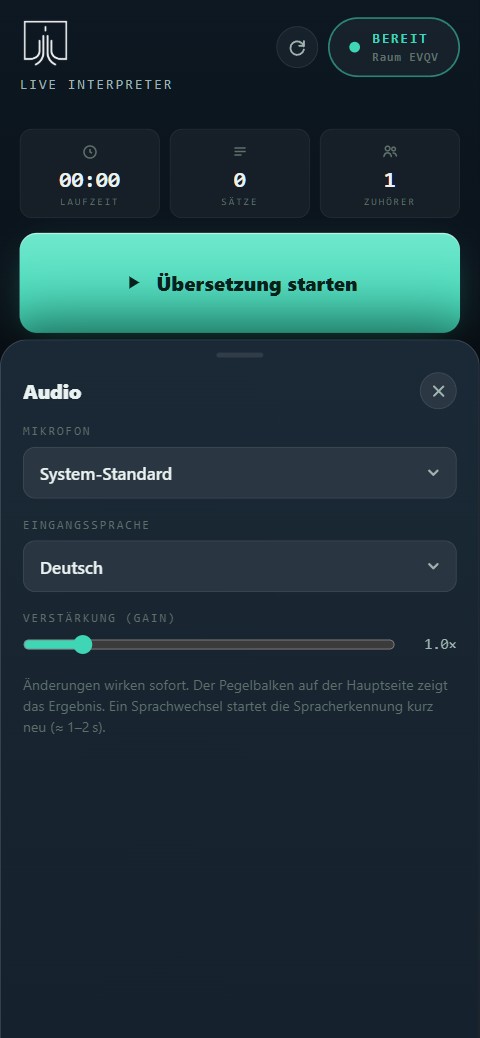
You can change the input language, microphone, gain and other audio settings at any time via the „Audio" tab at the bottom of the interface, even in the middle of a running session.
5 The listener view
This is what the listener interface looks like.
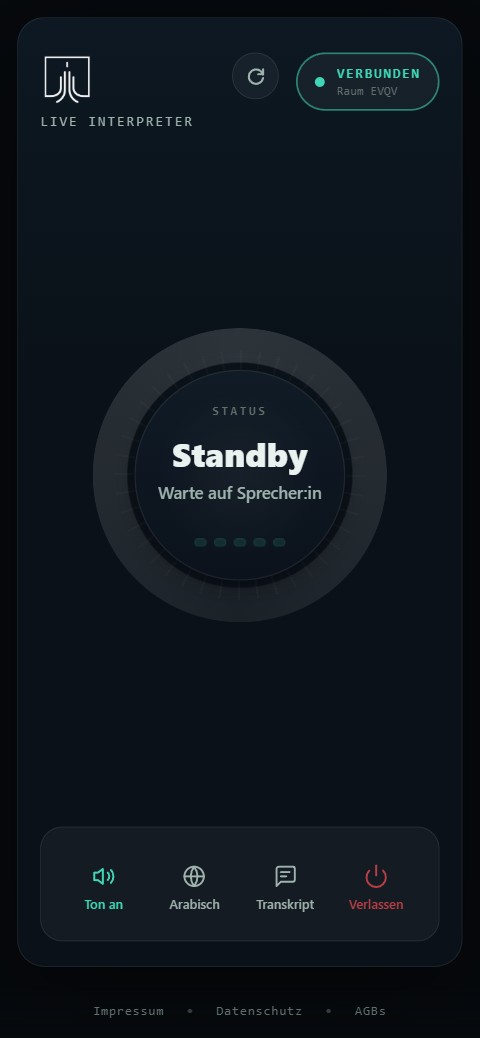
This is how your listeners join:
- Scan the QR code or open the link.
- Select a language.
- Listen to the translation through headphones.
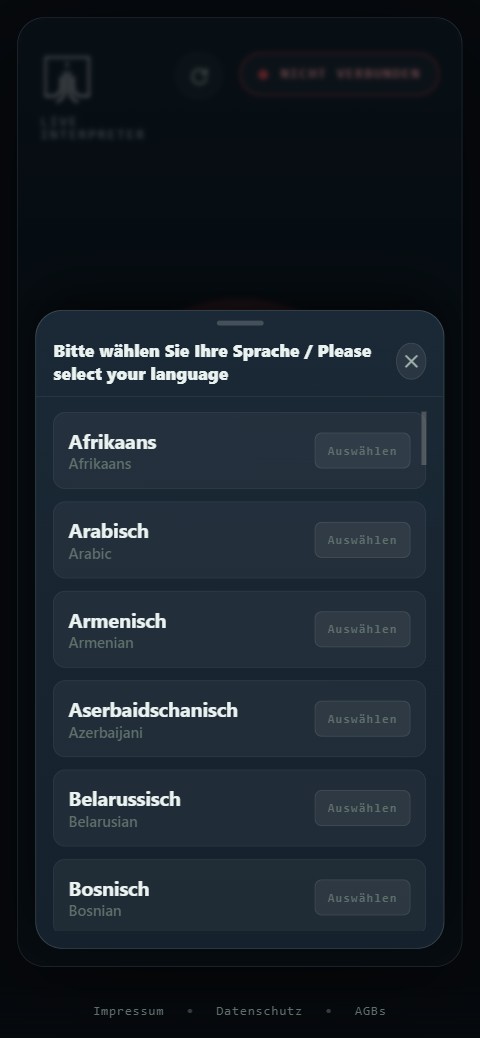
Listening and reading along
Your listeners hear the translation through their headphones. Anyone who also wants to read along opens the translated text via „Transkript" (Transcript) and follows live.
Some don't have headphones with them. They can mute the sound completely with „Ton aus" (Sound off) and follow the event via the transcript alone. That way everyone can keep up: via audio, text or both.
Listeners' connection status
At the top of the listener page is the connection status:
What listeners see during translation
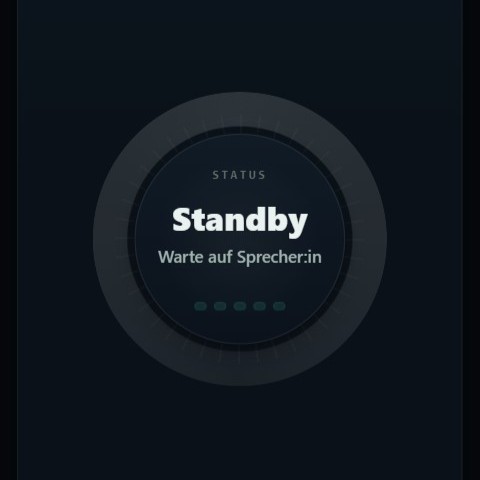
In the middle of the listener page an indicator shows what's happening right now:
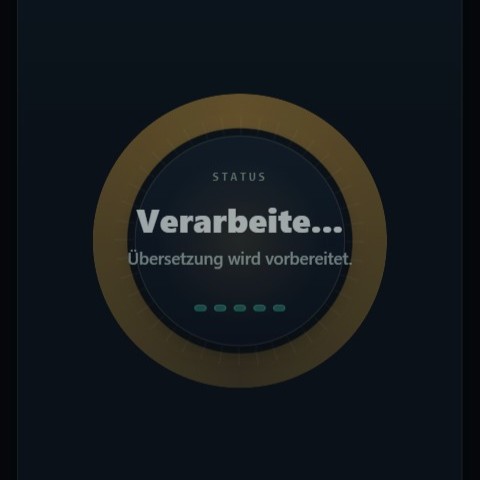
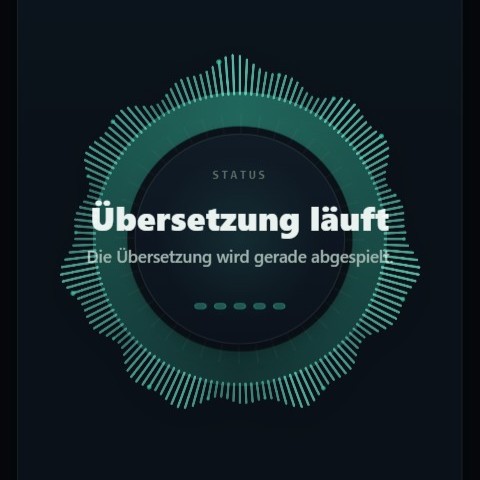
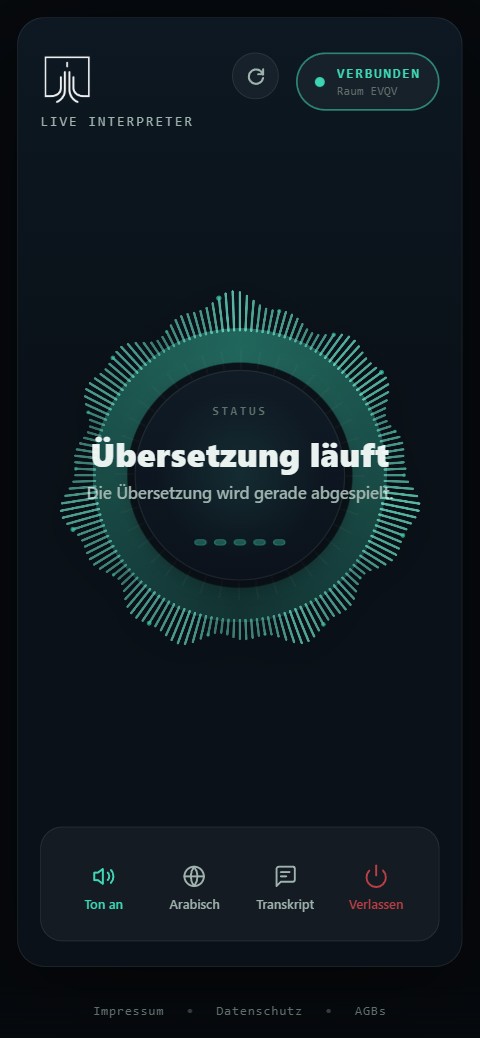
Recommend that your listeners bring their own headphones and only start the translation after tapping the screen. Some smartphones only allow sound after a touch.
6 Advanced settings
Many settings exist in two places: account-wide under Einstellungen (Settings) and per room under „Bearbeiten" (Edit). What you set in Einstellungen applies as the default for all rooms. What you set directly in a room applies only to that room and overrides the account-wide default there.
In Einstellungen (Settings, for all rooms)
The Einstellungen (Settings) concern translation behaviour and apply as the default for all your rooms, listed here in the order they appear in the app:
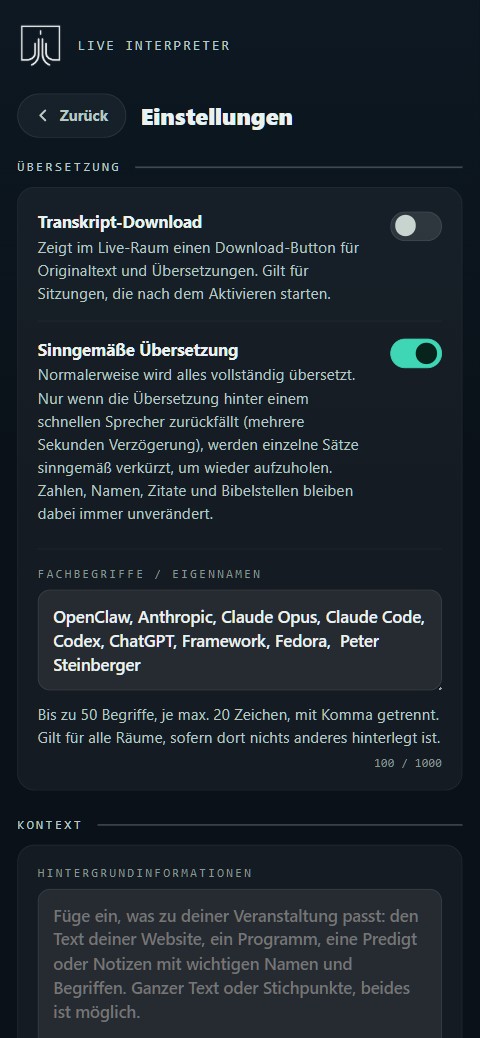
Transcript download. When this option is on, a button appears during live operation that downloads the complete transcript, including all translations, as a .txt file. Handy for documenting an event or reporting a problem to us, you can simply attach the file.
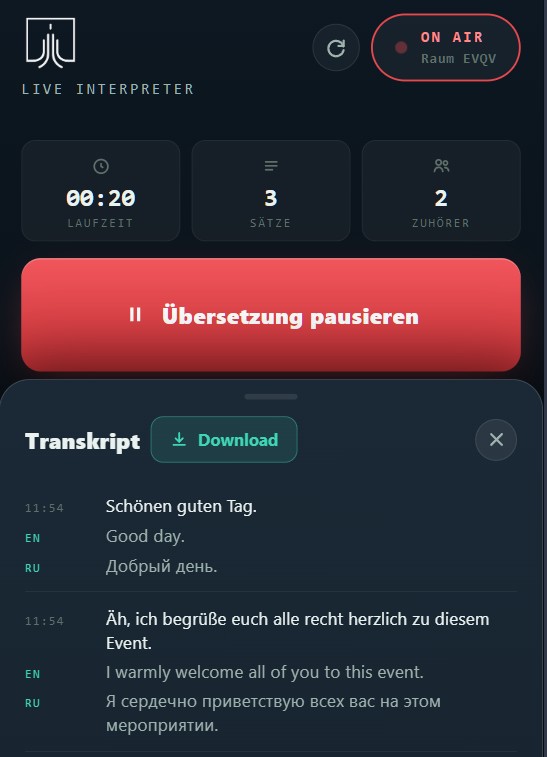
During live operation the transcript shows a „Download" button. The file contains the original and all translations. Gist translation. A catch-up feature for fast speakers. Some languages need more words than others for the same content (German, for example, more than English). With a very fast speaker the spoken translation can gradually fall behind the original, in extreme cases by 20 seconds or more. When this option is on, the app shortens the translation to its gist as soon as it falls behind, and so catches up again. As long as there's no backlog, everything is translated fully and normally.
The feature works in stages, depending on the backlog:
- From about 4 seconds behind: gentle trimming: subordinate clauses and filler words are dropped, the core content stays.
- From about 8 seconds: only the essentials in a short sentence; examples, lists and side points are dropped.
- If that isn't enough (from about 25 seconds): an entire translation segment is skipped so that listeners can catch back up to the live event.
Numbers, names, quotations and Bible references always remain unchanged.
Technical terms and proper names. This list is aimed specifically at the speech recognition. It sometimes struggles to transcribe unusual names, abbreviations or invented terms correctly, such as product names or very narrow scientific terms. If you store such words here (up to 50), the speech recognition detects and transcribes them more reliably.
Context and background information. This information goes to the translation AI itself. Even if the speech recognition slips up once, the translation can still turn out correct and sensible if the AI knows the context: it reads the sentences to be translated in the context of your event. That raises translation quality significantly. A tour guide could store details about their tour and its individual stops here, a company excerpts from its website, a congregation the text of the sermon.
The allowed size here is very generous: unlike the maximum of 50 technical terms, you can paste in whole, multi-page documents.
Staff. Under Einstellungen (Settings) you invite staff members. They may manage assigned rooms and start sessions, but have no access to the account and billing. You define which rooms a staff member may manage per room under „Bearbeiten" (Edit).
Per room (under „Bearbeiten", Edit)
On an individual room you open „Bearbeiten" (Edit) and define what should apply to that room only:
- Name and source language of the room.
- Pre-assign languages: by default your listeners choose their language freely until your plan's channel limit is reached. Here you reserve certain languages guaranteed for every session, useful for multilingual events that you plan in advance.
- Custom technical terms and custom context for this room only. They override the account-wide default from Einstellungen (Settings).
- Staff access: which staff members may manage this room.
7 Account
While Einstellungen (Settings) concern translation behaviour, the Konto (Account) is about your access: your credit, your usage and your subscription.
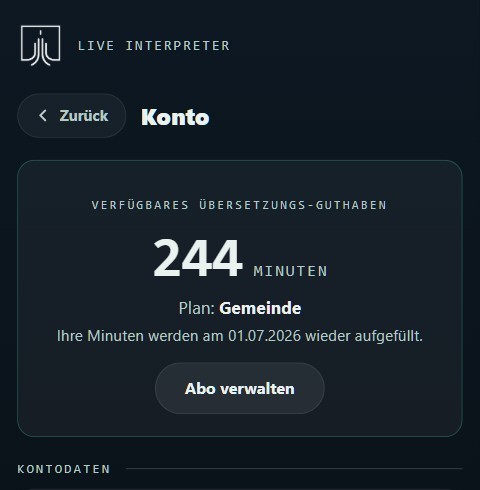
- Translation credit: your remaining minute balance, your current plan and the date on which the minutes are topped up again.
- Account details: email, name and organisation, which you can change and save here.
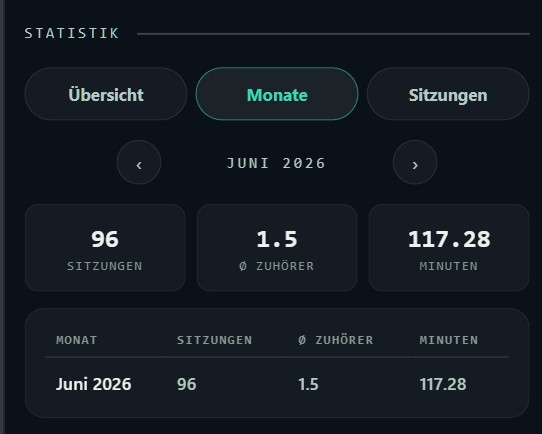
- Statistics: an overview of your usage: sessions, average listener count and translated minutes, either as an overview, per month or per session.
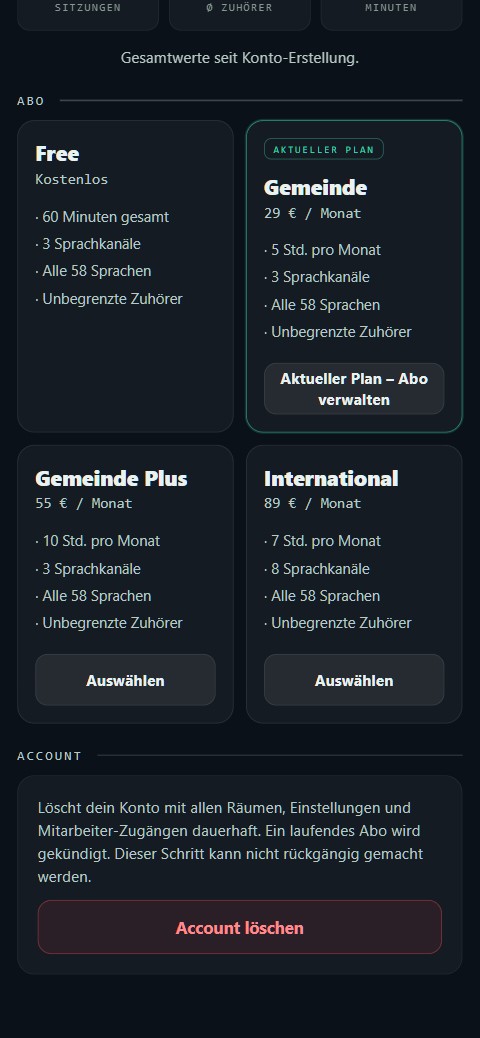
- Subscription: your current plan and all available plans with their minutes and language channels. Here you switch plans or manage your subscription. Via „Abo verwalten" (Manage subscription) you reach our payment provider Stripe, where you can, among other things, download your invoices for your accounting.
- Delete account: permanently deletes your account with all rooms, settings and staff access and cancels an active subscription. This step cannot be undone.
8 Before the event
Most problems during operation can be avoided if you do a quick test beforehand. Set aside a few minutes for it. This checklist sums up everything important:
- Connect the microphone and select it in the audio settings (section 3).
- Do a sound check: watch the level, it should show „Signal gut" (Signal good). For „Sehr leise" (Very quiet) or „Zu laut" (Too loud), adjust the gain.
- Monitor the input signal (with headphones) and check that your speech arrives clearly and without background noise.
- Do a test translation: connect your own phone as a listener, speak a sentence and check that the translation comes through cleanly.
- Check the internet connection. A stable connection is important, ideally Wi-Fi with good reception or a wired LAN.
- Check your credit (under Konto, Account) so it's enough for the planned duration.
- For multilingual events: pre-assign the required languages if needed (section 6).
During the test, deliberately speak a few normal sentences and look at the live transcript. If the recognised text is correct, the translation is usually correct too. If the recognised text already has errors, it's almost always the sound (see section 3).
9 Common questions and troubleshooting
10 Disclaimer
What you can expect from the AI translation
Live Interpreter delivers simultaneous translation at the level of experienced interpreters (typical accuracy around 85 to 95%). That's very good, but not mathematical perfection: language is always interpretation too. Unlike a document translation (e.g. with DeepL or ChatGPT), several components have to work together here in real time.
Why simultaneous translation is harder
The AI handles three tasks at once and in real time: it must first recognise and transcribe what's spoken correctly, then translate it immediately, and finally turn the written translation into spoken language. Each component has its own challenges to contend with.
Typical challenges
- Mixed languages. If a German speaker sprinkles in English technical terms („customer journey"), the AI can usually handle it well. But misunderstandings can occur, because the AI model expects a German expression.
- Strong accents or dialects. If the speaker uses a strong dialect such as Swabian or Bavarian, it quickly pushes the AI to its limits. Today's models are generally trained on standard German and still have weaknesses recognising dialects.
- Pronunciation of proper names. Names like „Fraunhofer", „München" or „BMW" can appear correctly in the transcript, but the voice output can sometimes stress them wrongly, because the voice follows the target language's pronunciation rules. With many proper names, the text mode for reading along is worthwhile.
- External conditions. Sound quality, background noise and room acoustics have the greatest influence on the result. The AI isn't magic: it needs good input conditions, just as a human interpreter needs a quiet booth.
Managing your listeners' expectations
Communicate realistically in advance. Don't promise your listeners „100% accurate translation" and point out that mistakes can certainly happen.